


- Top >
Permits bloc registration of course-related data to multiple courses
This page explains the bloc registration to multiple courses function.
It has been necessary for faculty in charge of multiple courses, to register course data (notices, study material distribute, reports, class message boards, questionnaires) to each course, but when registering course-related data, you can now perform bloc registration of the same data to other courses you are in charge of.
(The following procedure is introduced taking a notice as an example.)
- Multiple course bloc registration procedure (new)
- Multiple course bloc registration procedure (modification)
- Multiple course bloc registration procedure (deletion)
1.Multiple course bloc registration procedure (new)
-
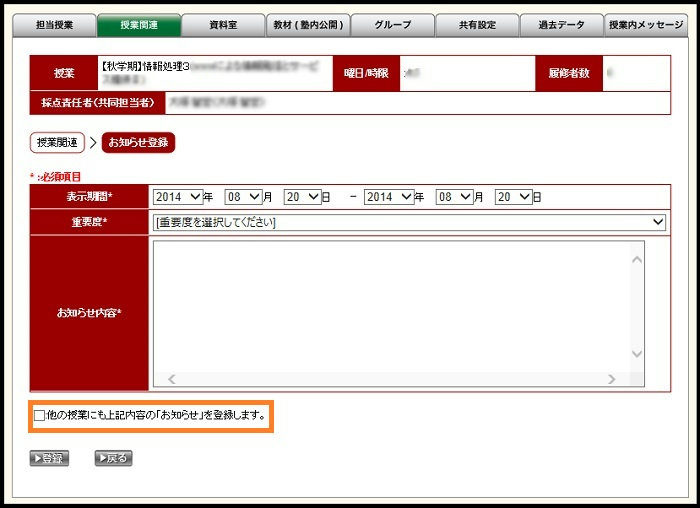
Click [Register notice] of notice of course data.

-
The following screen is displayed in Register notice. Clicking the check box at the bottom of the screen (registers the notification with the above contents in another course.) displays the courses you are in charge of.
-
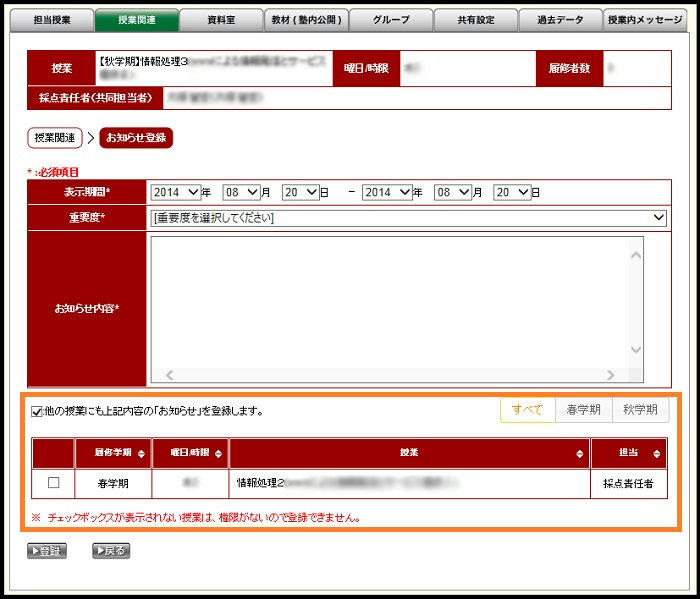
Other courses you are in charge of are displayed.
-
First enter the required items and select the other courses in which you wish to register the notice, then click the registration button.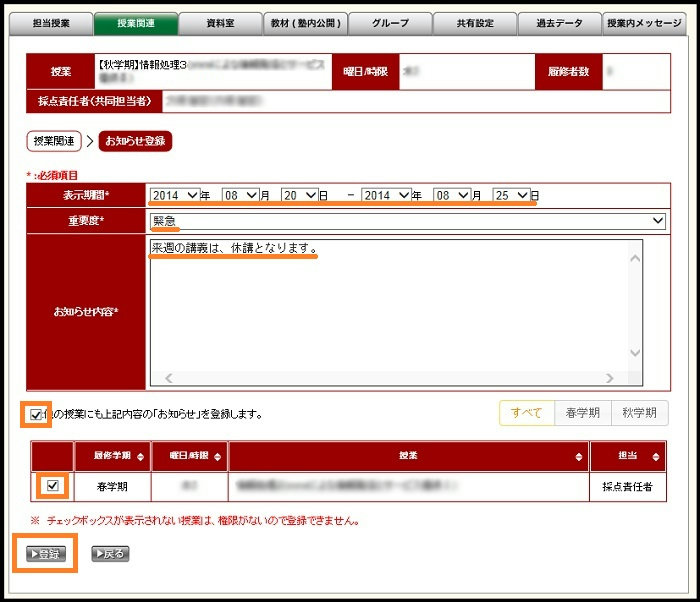
-
The registration confirmation screen is displayed, so after confirming the registration contents, click [Register] at the bottom.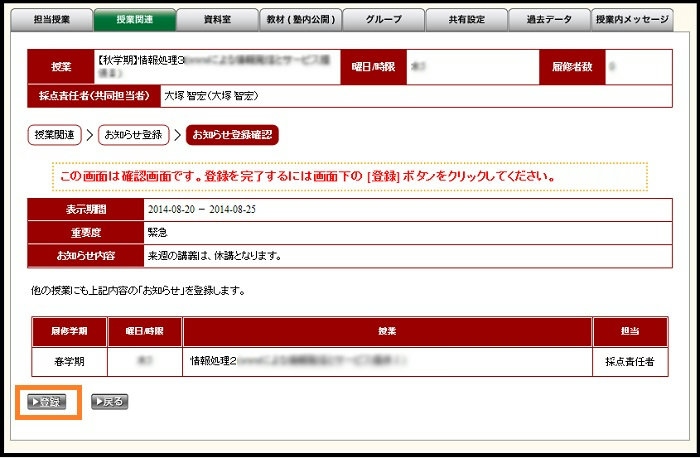
2.Multiple course bloc registration procedure (modification)
-
Click the notice modification (pencil icon) button.

-
Edit the contents you wish to modify, and click the [Modify] button at the bottom.
* If you do not need to modify another course, remove the check beside that course so it will not be modified. If you select another course that you did not select during modification, it will be newly registered.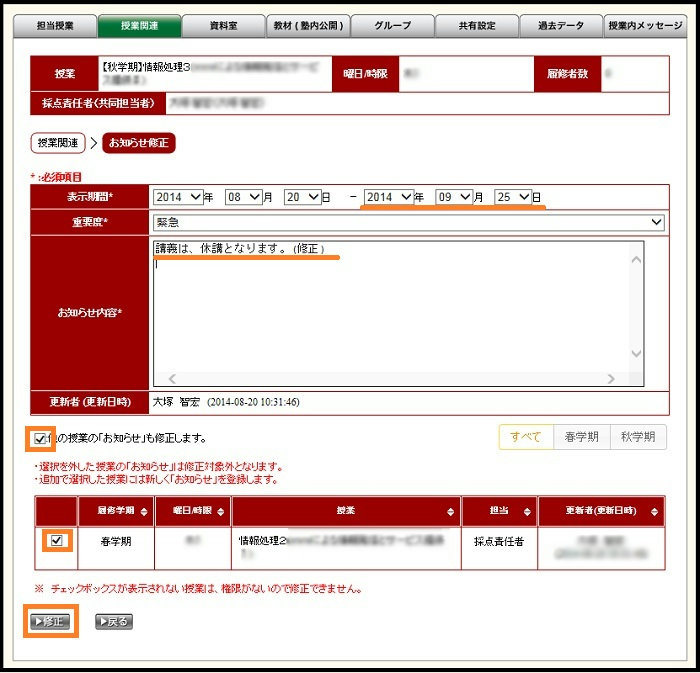
-
The modification confirmation screen is displayed, so after confirming its contents, click the [Modify] button at the bottom.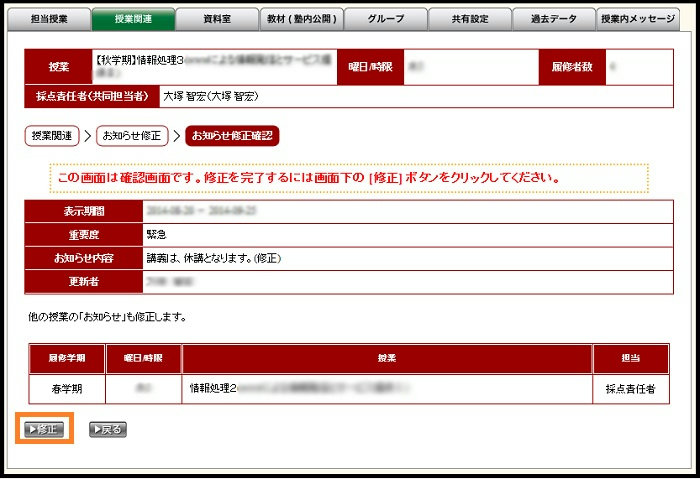
3.Multiple course bloc registration procedure (deletion)
-
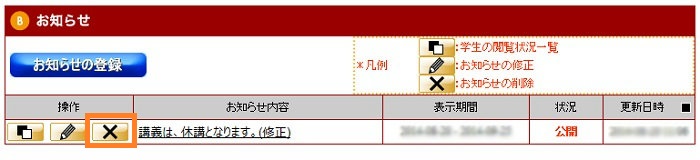
Click the notice deletion ([×] icon) button.
-
After checking the contents to make sure it will be no problem to delete, click the [Delete] button at the bottom.
* If you do not need to delete from another course, remove the check beside that course so it will not be deleted.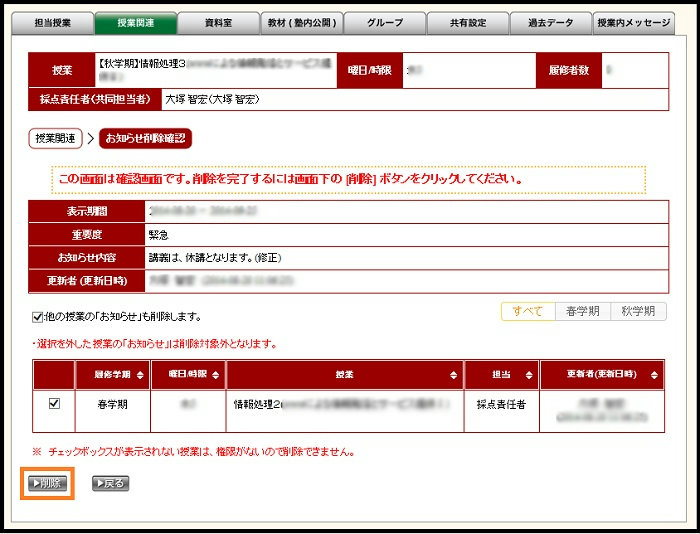
-
The deletion confirmation message will be displayed, so click the [Delete] button.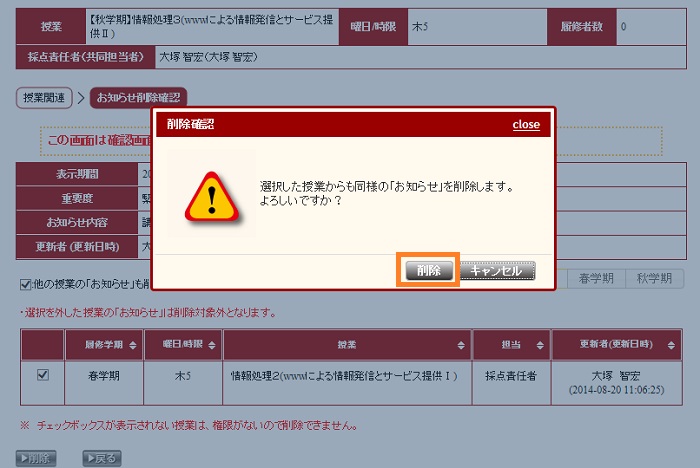
Last-Modified: July 17, 2015
The content ends at this position.