


Test: Student List
This feature lets you check each student's progress on a test. This feature also lets you Mark of descriptive answer.
The "Studying" status in test results
The status sometimes remains as "Studying" even after conducting a test.
(in this example, the time limit for the test is 10 minutes.)
-
Students who spent less than 10 minutes for the test but whose status is "Time limit expired."
If "Submit" is not clicked when finishing the test and any of the following actions are taken, the "Time limit expired" status is displayed before spending 10 minutes.- Clicked "Save temporarily" and closed the answer screen.
- Moved back to "Test list."
- Closed the browser before finishing the test.
-
1Students who spent 10 minutes for the test but their status is "Time limit expired."
Normally, automated submission takes place when 600 seconds have elapsed. If, however, the Back button of the browser is clicked or re-submission is performed with another browser, the spent time is regarded as over 10 minutes. In that case, submission process is not performed and the status becomes "Time limit expired." -
How to handle the "Studying" status.
- You can check "Display tests while studying" in the "Test result details" dialog to check the test results.
- You can manually set the status as Study complete to check the score.
*If the test is conducted only once, you can also enable retesting, depending on the submission and open periods.
Test: Student List
The menu provides functions such as checking each student's progress on a test, changing the study status and mark of descriptive answer. Click the name of a test to display the student list.
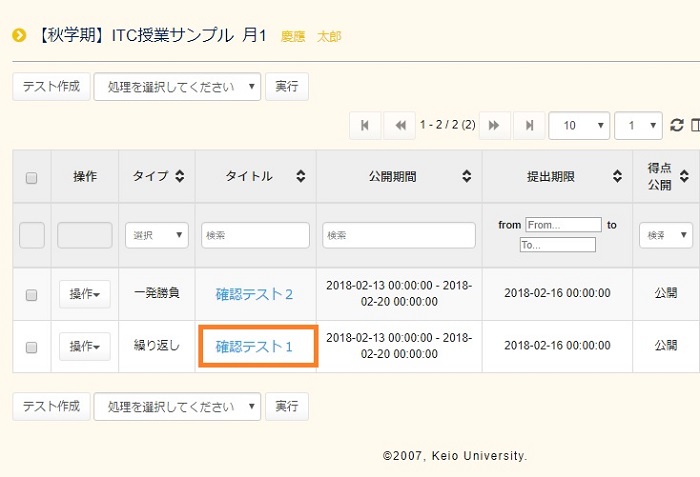
Details about the test and student list are displayed. Use the provided functions from the operation menu.
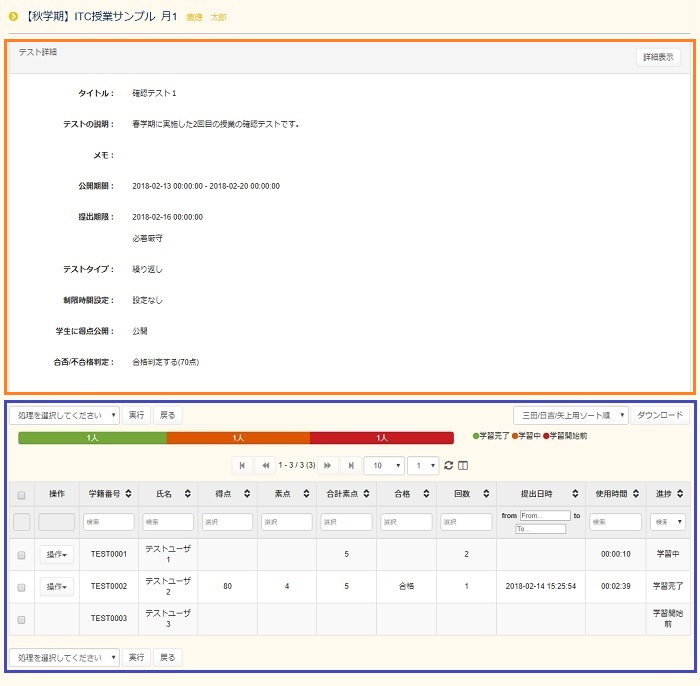
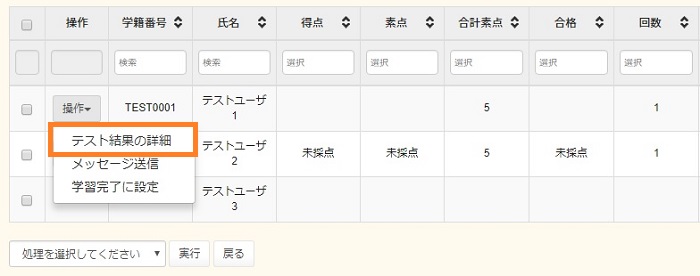
Operation on Each Student
Detail
-
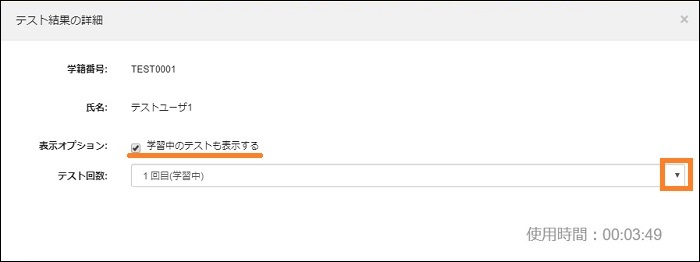
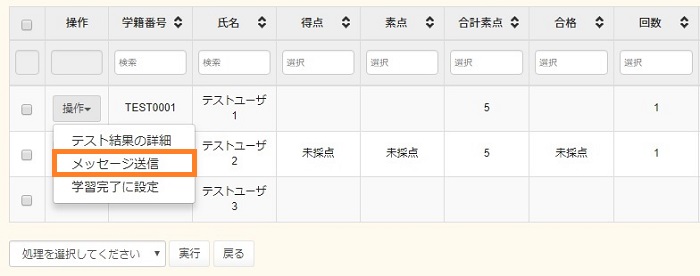
Click [Detail] from the operation menu for a student whose test result you want to check.
-
- [Display Option]
- Enable it to display tests which the student is currently taking. This menu item does not appear if no test has been submitted by the student.
- [Times]
- Setting the number of tests enables you to check the history of the test.
Send Message
This feature allows you to select multiple tests and send messages.
-
Click [Send Message] from the operation box for a student to whom you want send a message.
-
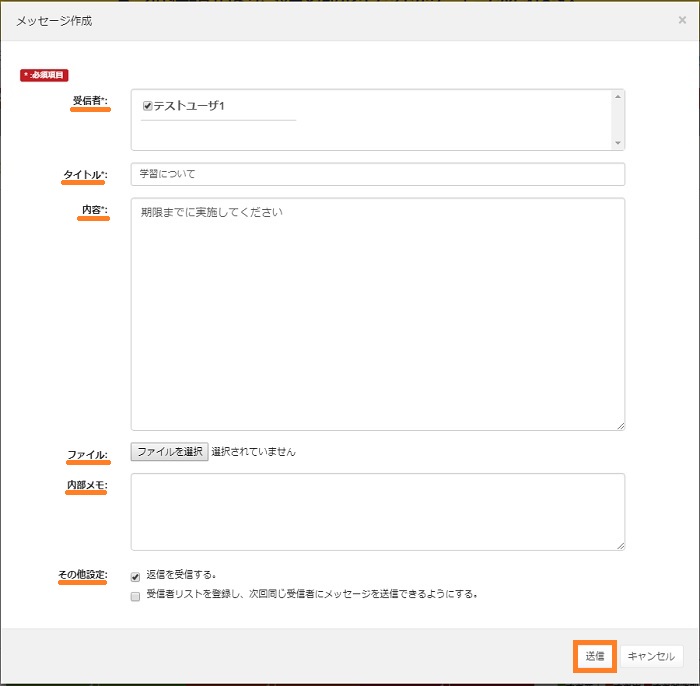
The message creation screen opens. Enter necessary items and click [Send].
- [Recipient]
- The selected student is displayed.
- [Title]
- Enter the title of the message.
- [Content]
- Enter the message.
- [File]
- The feature allows you to attach a file to the message.
- [Private memo]
- Use this feature to make a distinction when there are many similar messages. (Internal notes are not sent.)
- [Other settings]
- If you remove a check from [Receive the reply message.], the receiver cannot reply to the message.
- Entering a check in [Register the recipients list which is available when sending an message to the same recipients.] and enter the name of the receiver list when sending it to register the receiver to the list.
* The receiver is registered to the list used in in-class messages. The receiver list is not available for the send message feature of the test functions.
-
A confirmation screen appears. Click [Send].

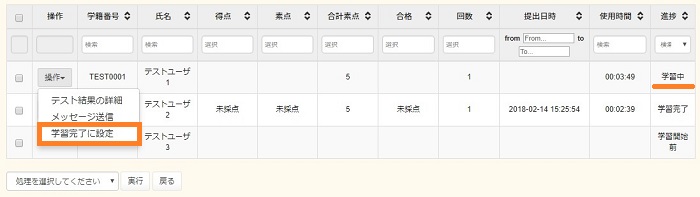
Set status to "complete"
If the progress status is "Not started," this setting cannot be made. This feature allows you to select multiple tests and set a student's status to "Test Completed."
-
Click [Set status to "complete"] in the operation box of the student whose status you want to set to "Test Completed."
-
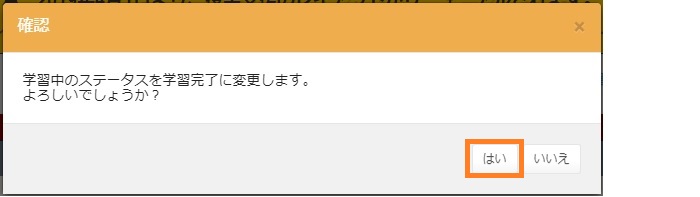
A confirmation screen appears. Click [Yes].
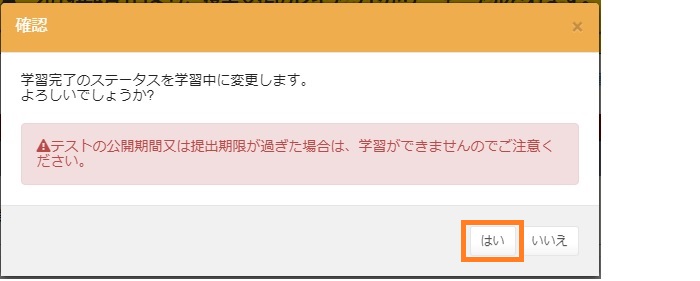
Set status to "In progress"
If the progress status is "Not started," this setting cannot be made. This feature allows you to select multiple tests and set a student's status to "Taking Test."
-
Click [Set status to "In progress"] in the operation box of the student whose status you want to set to "Taking Test."
* If the test display period or submission deadline is over, students cannot take the test anymore.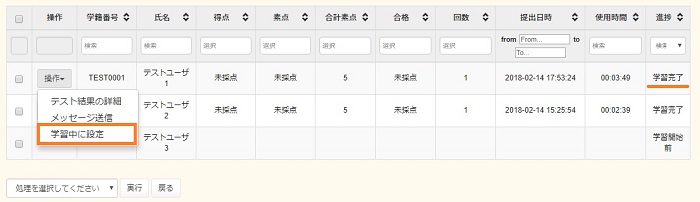
-
A confirmation screen appears. Click [Yes].
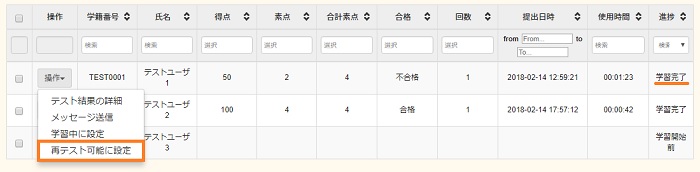
Set to be resume (One shot settings)
If the progress status is "Not started," this setting cannot be made. This feature allows you to select multiple tests and set their statuses to "Retest Available."
-
Click [Set to be resume] in the operation box of the student whom you would allow to take the test again.
-
A confirmation screen appears. Click [Yes].
* If the test display period or submission deadline is over, students cannot take the test anymore.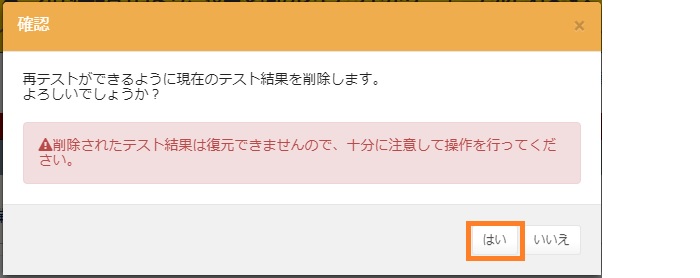
Operation on Multiple Students
You can select multiple students and change settings for them.
As for [Send Message], [Set status to "complete"], [Set as Taking Test] and [Set status to "In progress"], see the corresponding descriptions above.
Mark of descriptive answer (when essay questions are used)
-
Select the target student. Select [Mark of descriptive answer] from the pull-down menu at the top of the list and click [Execute].
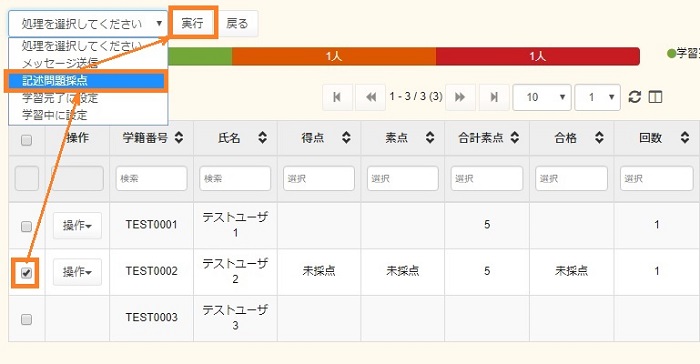
-
The essay question grading screen appears. Select the question, enter the score, and click [Register]. After completing registration, click [Cancel].
* Registration must be performed for each question after inputting the points.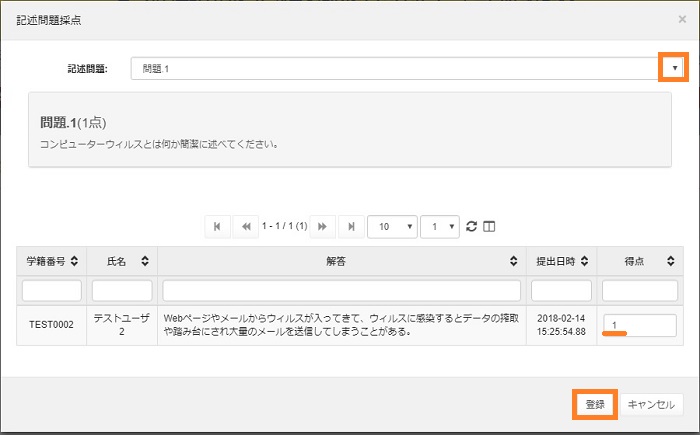
-
A confirmation screen appears. Click [Yes].

-
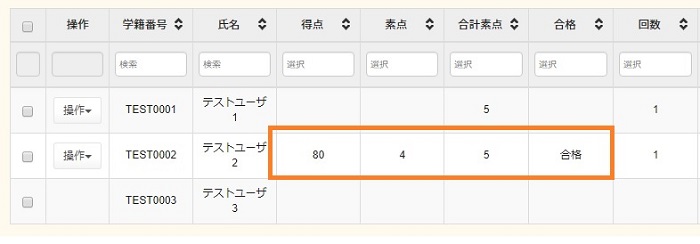
Results are displayed (starting with blank results).
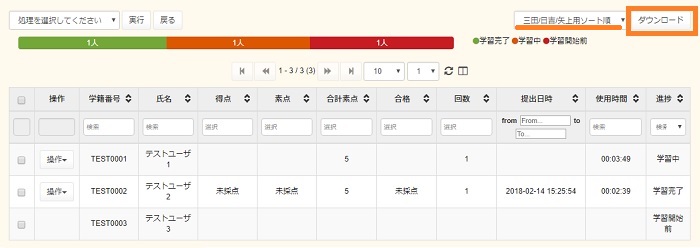
Download
-
Select the sort order from "Student ID number order," "for Mita/Hiyoshi/Yagami" or "for SFC" and click [Download] to download the test results in CSV format.
-
The download screen appears. Enter a check in the checkbox to include questions and answers in the file. Click [Download].
The file is downloaded to the location specified by the user. (It is saved in the download folder by default.)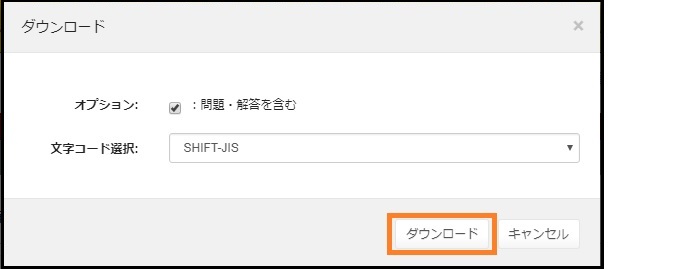
Last-Modified: June 24, 2020
The content ends at this position.